Moving is widely considered one of life’s most stressful events. Between packing boxes, coordinating movers, and setting up utilities at a new location, the physical and mental toll can be exhausting. However, there is one final hurdle that stands between you and a fresh start: move out cleaning. Whether you are a renter trying to secure the return of a security deposit or a homeowner preparing a property for its new occupants, the quality of your final scrub-down carries significant weight. A thorough job not only honors your lease agreement but also ensures a smooth transition for everyone involved.
The concept of deep cleaning for a move goes far beyond the typical weekly tidying. It is a restorative process designed to return a living space to its original state. While surface-level dusting is a start, true success lies in the details that are often overlooked during daily life. From the grease buildup behind the stove to the dust settled on top of door frames, every square inch of the property is subject to inspection. Understanding the scope of this task is the first step toward executing it efficiently.
Why Quality Cleaning is Essential for Renters and Sellers
For renters, the primary motivation for a rigorous move out cleaning is financial. Most lease agreements include a “broom-clean” or “professionally cleaned” clause. Failure to meet these standards often results in the landlord deducting cleaning fees from the security deposit, which can be significantly more expensive than doing the work yourself. Beyond the money, leaving a clean space maintains your reputation as a tenant, which is vital for future references in a competitive rental market.
For homeowners, preparing the home is a matter of professional courtesy and contractual obligation. Most real estate contracts stipulate that the home must be handed over in a specific condition. Beyond the legalities, it is simply the “golden rule” of real estate. Arriving at a new home only to find grime in the showers and crumbs in the cabinets is a disheartening experience for any buyer. By providing a spotless environment, you facilitate a positive closing process and ensure that the new owners can begin their journey in a healthy, welcoming space.
Establishing a Strategic Cleaning Plan
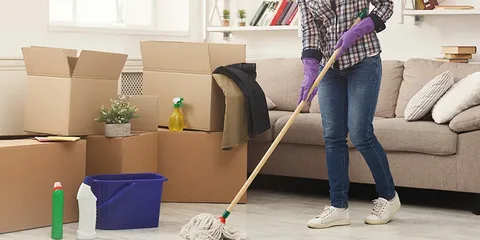
Approaching your move out cleaning without a plan is a recipe for burnout. The most effective strategy is to wait until the home is completely empty. Trying to work around boxes or furniture leads to missed spots and double work as dust is kicked up during the final move. Once the last box is loaded onto the truck, you have a clear canvas to work with. This allows you to see the true condition of the floors, baseboards, and walls without obstruction.
The most efficient flow is the “Top-to-Bottom, Back-to-Front” method. Gravity dictates that dust and debris will fall as you clean, so starting with ceiling fans, light fixtures, and high molding prevents you from having to reclean your floors later. Similarly, starting in the rooms furthest from the exit and working your way toward the front door ensures that you aren’t tracking dirt back into areas you have already perfected. This systematic approach saves time and ensures that no corner of the property is neglected.
Deep Cleaning the Kitchen: The Heart of the Inspection
The kitchen is arguably the most time-consuming part of any move out cleaning project. It is the area where grease, food particles, and bacteria accumulate most rapidly. Start with the appliances, as these are the first places a landlord or inspector will look. The oven should be degreased, including the racks and the glass door. If the stove is electric, ensure the drip pans are either scrubbed to a shine or replaced entirely. Don’t forget to pull the fridge out from the wall to vacuum the coils and mop the floor underneath, as this is a notorious hiding spot for dust.
Cabinets and drawers require a thorough interior wipe-down. Over time, crumbs and spice spills collect in the corners, and sticky fingerprints mar the handles. Use a vacuum attachment to clear out the debris before wiping the surfaces with a food-safe disinfectant. Finally, the sink and countertops should be polished until they are streak-free. If you have stainless steel appliances, using a specialized cleaner can provide that “like-new” luster that immediately catches the eye during a walkthrough.
Sanitizing Bathrooms for a Fresh Start
Bathrooms are the second most critical area in the move out cleaning process. Soap scum, hard water stains, and mildew can settle into grout lines and shower doors, making the space look unkempt even if it’s technically “clean.” A heavy-duty descaler or a vinegar-based solution is often necessary to break down buildup on showerheads and faucets. Ensure the toilet is cleaned inside and out, paying special attention to the base and the hinges of the seat, which are frequently missed during routine maintenance.
The vanity and mirrors should be left sparkling. Empty the medicine cabinet and under-sink storage, wiping away any ring marks left by toiletries or cleaning products. Finally, address the exhaust fan. Bathroom fans are magnets for lint and moisture-heavy dust; popping the cover off and vacuuming the interior can improve air quality and show an impressive level of detail. When the bathroom is done correctly, the room should smell fresh and look bright, providing a sense of hygiene for the next occupant.
Living Areas, Bedrooms, and General Surfaces
While the kitchen and bathrooms are the “heavy hitters,” the living areas and bedrooms require a different kind of focus. Here, the emphasis is on dust removal and wall maintenance. Scuff marks on walls can often be removed with a melamine sponge, but be careful not to buff away the paint finish. Dust all surfaces, including window sills, tracks, and blinds. If the home has a fireplace, ensure the hearth is swept and any soot is wiped away.
Closets are often overlooked during a move out cleaning. Once empty, they should be swept or vacuumed, and the shelves should be wiped down. Light switches and door handles—high-touch surfaces—should be disinfected to remove oils and germs. These small touches contribute to the overall sanitized feel of the home. If there are carpets, a professional steam clean is often required by landlords; if not, a deep vacuuming that includes the edges where the carpet meets the baseboards is essential to remove hidden allergens.
Windows and Floors: The Final Flourish
The clarity of the windows can transform the feel of a home. For an effective move out cleaning, windows should be cleaned inside and out (if accessible). Removing streaks and smudges allows more natural light to enter the space, making the rooms feel larger and more inviting. Don’t forget to wipe down the window frames and ensure the locks are free of grit. This level of attention suggests that the entire property has been meticulously maintained.
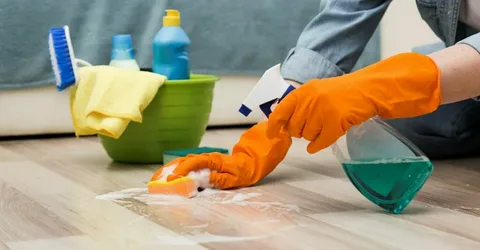
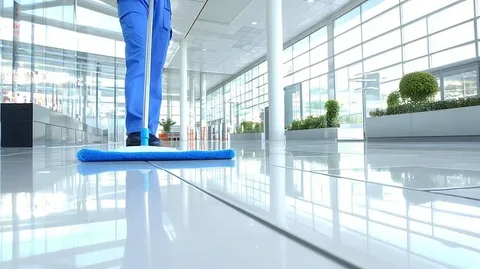
The final step in your journey is the floors. Once every other surface has been addressed and the dust has settled, perform a final sweep or vacuum. If you have hard floors—such as hardwood, laminate, or tile—finish with a damp mop using a cleaner appropriate for the material. Start at the farthest corner and back yourself out of the house. As the floor dries behind you, it creates a pristine, untouched look that is the hallmark of a successful transition.
The Benefits of Professional Assistance
Many people underestimate the sheer volume of work involved in a proper move out cleaning. It can easily take a full day or more for a single person to reach the required standards of a rental inspection. This is why many choose to outsource the task. Professional cleaners bring specialized equipment, high-grade chemicals, and a trained eye for the details that landlords and buyers prioritize. Hiring a team allows you to focus on settling into your new home while professionals handle the heavy lifting.
Ultimately, the goal is to close one chapter of your life with excellence and begin the next without the weight of an unfinished task hanging over you. It is a gesture of respect to the property and its future inhabitants. Whether you tackle the list yourself or hire an expert team, the peace of mind that comes from a job well done is worth the effort.
If you are in Windsor, ON, and looking for a reliable cleaning company to handle this transition for you, contact Cleaning CAN. Their experienced team specializes in detailed residential services, ensuring that your move out cleaning is performed to the highest standards. Let the experts take the stress out of your move so you can focus on your new beginning.
The FAQs
1. What is included in a standard move out cleaning?
A standard move out cleaning covers deep cleaning of all rooms, including inside kitchen appliances (oven, fridge), interior cabinets and drawers, sanitizing bathrooms, wiping down baseboards, cleaning window tracks, and a thorough vacuuming and mopping of all floors.
2. How long does a move out cleaning usually take?
The duration depends on the size and condition of the home. Generally, a 1-bedroom apartment takes 3–5 hours, while a 3-bedroom family home can take 8–12 hours for a single person to complete to professional standards.
3. Do I need to clean the walls when moving out?
Most lease agreements require walls to be “broom clean.” You should remove large scuff marks with a melamine sponge and dust away cobwebs. You are generally not required to repaint unless you have caused significant damage or painted them a non-neutral color without permission.
4. Should I do the move out cleaning myself or hire a professional?
If you have the time and supplies, DIY can save money. However, hiring a professional service like Cleaning CAN in Windsor, ON, ensures the job meets landlord expectations, saves you a full day of labor, and often includes a “clean guarantee” to help secure your deposit.
5. Is move out cleaning required to get my security deposit back?
Yes. Most landlords require the property to be returned in the same condition it was received (minus normal wear and tear). A failed inspection due to dirt or grease is the most common reason for deposit deductions.